How can we measure the volume of a liquid?
Plan Investigation 3.2
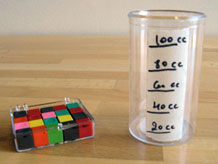
Minutes … Inches … Grams … Square feet … Most fourth graders have a passing familiarity with measures of time, length, weight, and area. But cubic centimeters? What are those?
In the last session, students discovered that they can't reliably compare liquid volumes using only their senses. In this investigation they get a hands-on introduction to cubic centimeters, a common unit of volume used by scientists. They then make and calibrate their own measuring cups and use them to measure some water volumes.
By the end of this investigation students will appreciate the usefulness of a standard unit of volume, become familiar with centimeter cubes, begin to associate these objects with equivalent amounts of space, and be able to compare liquid volumes with accuracy.
Learning Goals
- Become familiar with the volume of a centimeter cube
- Figure out how to make a measuring cup for liquids
- Begin to estimate volume in cubic centimeters
| Sequence of experiences | ||
|---|---|---|
| 1. Ask the question | All Class | 5 Mins |
| 2. Explore centimeter cubes | Small Groups | 10 Mins |
| 3. Make a measuring cup | Pairs | 20 Mins |
| 4. Make meaning | Discussion | 10 Mins |
Materials and Preparation
For the class:
- Post the investigation question in a place where all students can see it.
- 20-25 centimeter cubes for your class demonstration
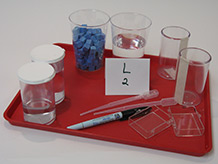
For each tray:
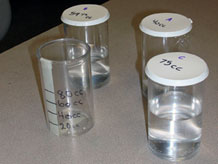
- 1 capped 150cc container approximately 1/2 full of water
- 1 capped 150cc container approximately 3/4 full of water
- 2 empty 150cc containers with a vertical strip of masking tape applied to the outside *
- 2 small rectangular plastic containers
- 2 pipettes
- 2 20oz cups approximately 1/2 full of water
- 1 fine tip permanent marker
- 1 cup holding approximately 75 centimeter cubes (these cubes will be handed out separately, before the rest of the tray)
*Student-made graduated cylinders will be used again Investigation 4.3.
1. Ask the question
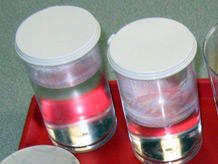
Show the class the two covered containers that are filled to different levels with water.
- Which container has a greater volume of water?
- Exactly how much greater is the volume of water in one container than another?
Listen to how students compare the volumes in the absence of units of measure. They may say things like "Only a little more," "About an inch more," "Maybe three bottle caps more," "Half again as much."
As students wrestle with the need for a standard unit of measure, introduce the investigation question:
How can we measure the volume of a liquid?
Let students brainstorm ideas then, as the ideas run out, give each student a centimeter cube.
2. Explore centimeter cubes
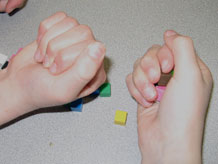
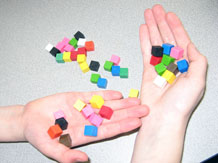
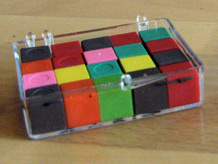
As students explore the centimeter cubes, explain that scientists have designed a way to measure how much space something takes up. They use a unit of measure called a cubic centimeter, which takes up exactly as much space as the cube they hold in their hands. Point out that every edge of the cube is exactly one centimeter long.
- Can you show me with your fingers how much space a cubic centimeter takes up? Be sure you think 3-D!
- Can you think of something that has a volume of just 1 or 2 or 3 cubic centimeters?
One M&M candy has a volume of less than 1 cubic centimeter; a large blueberry, a tooth, or a pencil eraser can have a volume close to 1 cubic centimeter. A marble may have a volume of close to 2 cubic centimeters.
Demonstrate how you can use centimeter cubes to measure and describe the amount of space something takes up. For example, you can get an approximate measure of the amount of space inside your closed hand by scooping up cubes and counting. Keep adding cubes until you can no longer wrap your fingers around them without some of them showing, then let the class know the results.
It looks like my hand can hold about [XX] cubic centimeters of stuff.
Students may point out that the volume is actually greater because there are spaces between the cubes in your hand. Acknowledge this observation.
Distribute a cup of centimeter cubes to each group and ask each student to measure the volume of their own closed fist in the same way. When students finish, do a quick "show of hands" survey of the results.
- How many people had more than 10 cubic centimeters of space inside their closed fist? How many had more than 15 cubic centimeters of space inside their closed fist?
Have students use the cubes to estimate the volumes of some other solid objects nearby, perhaps a pencil, or a whiteboard eraser, or an apple. Continue to ask for estimates throughout the lesson, so students can get practice with the new unit of measure.
Centimeter cubes and cubic centimeters: Students may be confused at first about the difference between centimeter cubes and cubic centimeters. Centimeter cubes are the physical cubes, often made from wood or plastic; they have a dimension of one centimeter along each edge. A cubic centimeter is the amount of space that a centimeter cube takes up; it is a standard measure for volume.
If you sense confusion, ask, "Are you talking about the object, or are you talking about the volume (or, the amount of space it takes up or, the unit of measure)?"
3. Make a measuring cup
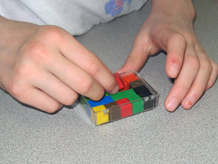
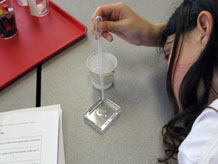
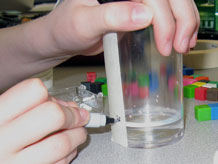
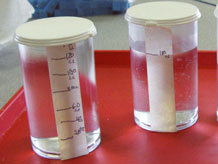
Distribute a tray of materials to each group of students and point out the two containers of water.
- How could we use our centimeter cubes to measure these two volumes of water?
As the students brainstorm some ideas, they may suggest stacking the cubes next to the containers. Good idea — but the measure will be approximate, like the measure of the space inside their hand.
- How can we get an exact measurement?
- Could we make some sort of measuring tool that will help us measure the volume of the liquid?
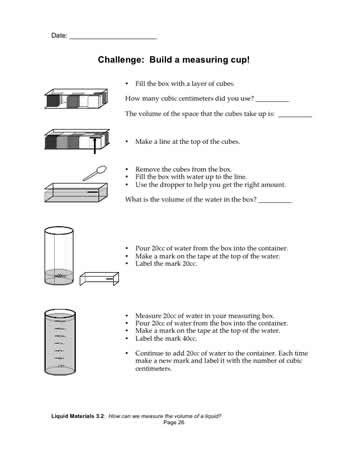
If anyone has ever used a recipe to bake cookies or cook a meal, they have probably used a measuring cup, a cup with marks on it that allows them to pour the exact amount of water or milk or oil that’s needed. Let students know they will now make their own "measuring cups," using the centimeter cubes to help them. Ask them to open their science notebooks, and point out the steps outlined there [Challenge: Build a measuring cup!].
Letter from the Engineer
The measuring cups you are about to build are really scientific instruments. They are important to have in the kitchen when you need to measure a certain volume of milk or water for a recipe, and they are important to scientists and engineers when they need to carefully measure the volume of liquids. But a measuring cup will not help you to bake good cookies or make accurate scientific measurements unless it has been built very carefully. What makes a measuring cup accurate? There are certain important features or standards — also called criteria — that make a measuring cup accurate. Here are some of those criteria. See if you agree that each one is important.
- The lines need to be in the right places.
- The lines need to be “level” or horizontal, not wiggly or slanted.
- The lines need to be thin but also easy to see. (What’s the problem with a thick line?)
- The lines need to be labeled with volume measurement units (for example, cubic centimeters)
Whenever engineers design anything, they need to identify the important criteria that allow them to know if the design is a success.
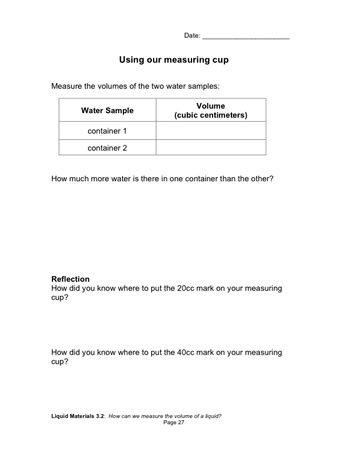
After they finish making their measuring cups, students use them to measure the volumes of the two water samples. They enter the volumes in their notebooks, compare them, and answer three reflection questions [Using our measuring cup].
What about liters? Some students may be familiar with liters, another metric unit of volume, which is used for containers of water and soda sold in grocery stores. Liters and cubic centimeters are related like this:
1,000 cubic centimeters = 1 liter
1 cubic centimeter = 1 milliliter
We use cubic centimeters for our units in this curriculum because we have a concrete, tangible way to represent the volume — our centimeter cubes.
4. Make meaning
Purpose of the discussion
The purpose of the discussion is to replicate what was done in words, including giving a rationale for the methods used to build a measuring cup. This will help students consolidate their learning and you will gain insight into what they are taking away from today's investigation. Return to the investigation question for discussion: How can we measure the volume of a liquid?
Engage students in the focus question
- This was a busy investigation with lots of steps. Does it all make sense to you? Pretend a visitor has come into the room and has no idea what you just did. How would you explain today’s work?
Do students touch on all the following points as they describe their work:
- In science, a standard unit of measure for volume is cubic centimeters.
- We can use centimeter cubes to help us measure or estimate volume.
- We can use a measuring cup to measure liquid volumes.
Are they able to answer the investigation question:
How can we measure the volume of a liquid?
Summarize the discussion and recap the investigation
Let students know that as they work with more liquids, they’ll be able to use the measuring cup they made and will get better at estimating volumes. For example, imagine a can of soda. Is it more or less than 140 cubic centimeters (the capacity of the measuring cups they just made?) Based on today’s experience with cubic centimeters, what do they think the volume of a can of soda might be?
Cubic confusion? Some students may be having trouble making the mental transition from centimeter cubes, which are solid physical objects, to cubic centimeters, units that can be used to measure liquid volumes. It might help to explain it this way: We describe the volume of things using the words cubic centimeters even when we can’t see cubes at all. If we have a good measuring cup, and we pour juice into it, and see that it reaches the level of 60 cubic centimeters, we know we have 60 cubic centimeters of juice, because its volume is the same as 60 of those centimeter cubes, and not because the juice looks at all like a cube.


