What is soil made of?
2. Explore the soil samples
Distribute the trays of materials. Have each student take a plate, draw a line down the center, and label the two halves "Soil A" and "Soil B," as shown in the notebook [Observing soil grains], then sprinkle a small amount of each soil sample onto the appropriate side of the plate.
Let students know that the tiny particles of material they see in the soil are called "soil grains," then issue a challenge.
- You have two kinds of soil on your plate. How is one different from the other? What are their properties? What kinds of materials are they made of?
Students may work in pairs if they wish.
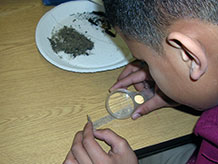
What to do with the tape? The tape can be used to isolate some small soil grains for close observation. Just press a short piece of tape onto some of the grains on the plate, lift the tape, and use a magnifier to examine the individual grains.
As your circulate among the students, see how many properties they can come up with on their own. If necessary, mention some other properties that might help them determine what soil is made of, e.g., color, smell, size, shape, and luster. Confirm that students see some organic matter in the soils, e.g. bits of leaves, sticks, and bark. Make sure students are recording both their observations and their ideas in their notebooks.
As the pace of data collection slows, have students answer the three questions in their notebooks [Observing soil samples].