How can we measure the volume of a liquid?
3. Make a measuring cup
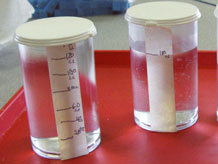
Distribute a tray of materials to each group of students and point out the two containers of water.
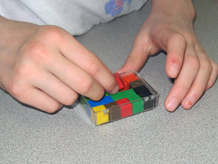
- How could we use our centimeter cubes to measure these two volumes of water?
As the students brainstorm some ideas, they may suggest stacking the cubes next to the containers. Good idea — but the measure will be approximate, like the measure of the space inside their hand.
- How can we get an exact measurement?
- Could we make some sort of measuring tool that will help us measure the volume of the liquid?
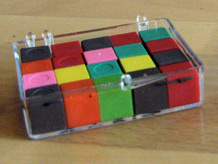
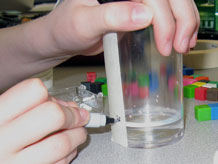
If anyone has ever used a recipe to bake cookies or cook a meal, they have probably used a measuring cup, a cup with marks on it that allows them to pour the exact amount of water or milk or oil that’s needed. Let students know they will now make their own "measuring cups," using the centimeter cubes to help them. Ask them to open their science notebooks, and point out the steps outlined there [Challenge: Build a measuring cup!].
Letter from the Engineer
The measuring cups you are about to build are really scientific instruments. They are important to have in the kitchen when you need to measure a certain volume of milk or water for a recipe, and they are important to scientists and engineers when they need to carefully measure the volume of liquids. But a measuring cup will not help you to bake good cookies or make accurate scientific measurements unless it has been built very carefully. What makes a measuring cup accurate? There are certain important features or standards — also called criteria — that make a measuring cup accurate. Here are some of those criteria. See if you agree that each one is important.
- The lines need to be in the right places.
- The lines need to be “level” or horizontal, not wiggly or slanted.
- The lines need to be thin but also easy to see. (What’s the problem with a thick line?)
- The lines need to be labeled with volume measurement units (for example, cubic centimeters)
Whenever engineers design anything, they need to identify the important criteria that allow them to know if the design is a success.
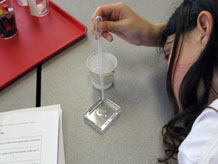
After they finish making their measuring cups, students use them to measure the volumes of the two water samples. They enter the volumes in their notebooks, compare them, and answer three reflection questions [Using our measuring cup].
What about liters? Some students may be familiar with liters, another metric unit of volume, which is used for containers of water and soda sold in grocery stores. Liters and cubic centimeters are related like this:
1,000 cubic centimeters = 1 liter
1 cubic centimeter = 1 milliliter
We use cubic centimeters for our units in this curriculum because we have a concrete, tangible way to represent the volume — our centimeter cubes.