What happened to the water?
Plan Investigation 7

Students have been tracking the weight of their mini-lakes and exploring ideas about what happens to matter during the processes of dissolving and evaporation.
Today students are introduced to three new closed systems, called 2-bottle systems. These systems will allow them to investigate what happens to water once it evaporates. Does evaporation destroy water, or can students find evidence that it still exists, as they did to see if dissolved salt still exists?
One system holds fresh water and a sand-gravel-rock mix, one holds salt water, and one holds blue-tinted fresh water. Read more information about the 2-bottle system below.
By the end of this investigation students will understand how a closed system can provide evidence to help us explain a process we can't observe directly.
Learning Goals
- Understand the difference between an open system and a closed system
| Sequence of experiences | ||
|---|---|---|
| 1. Ask the question | All Class | 5 Mins |
| 2. Uncover the mini-lakes | Pairs | 15 Mins |
| 3. Introduce the 2-bottle systems | All Class | 15 Mins |
| 4. Observe and predict | Individual | 10 Mins |
| Evaporation Concept Cartoon | Individual | |
About the 2-bottle system
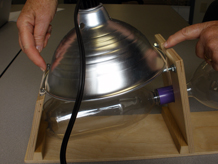
The 2-bottle system is made of a 1-liter plastic bottle coupled to a 2-liter plastic bottle and held in position by a small stand. The system helps students deepen their understanding of the phase changes that are part of the water cycle, specifically the relationship between liquid water, evaporation, water vapor, and condensation. Three 2-bottle systems are used in this investigation.
Each of the lower, smaller bottles starts with 30 grams of water plus one other material (a sand-gravel mix, kosher salt, or blue food coloring). The inside of each lower bottle represents Earth's surface with an atmosphere and a body of water, and is warmed by a lamp. Each upper bottle initially contains only air. The upper bottle represents a "different place" to which water can travel in its vapor form, condense, and collect. The upper bottle prevents evaporated water from just disappearing into the classroom air. Within approximately one week (if the lamps are left on continuously) all of the water in the warmer lower bottle will evaporate, and will condense and collect in the cooler upper bottle.
Why use a lamp, when evaporation can take place even at cooler temperatures? The 2-bottle system is a very tiny closed system in comparison with the system it attempts to model, which is the closed system of Earth and its atmosphere. The limited amount of air inside the bottles becomes extremely humid once evaporation starts. Such high humidity would slow and eventually stop net evaporation long before the water has completely evaporated from the lower bottle. The purpose of the lamp is to force evaporation to continue in spite of the high humidity in the closed 2-bottle system. Having all of the water in the lower bottles move to the upper bottles, leaving the sand-gravel mix, the salt, and the blue food coloring in the lower bottles, highlights the role that evaporation plays in the real world.
The bases that support the bottles also hold the lamps in the correct position. Set up as shown, and using a 100 watt bulb as specified, the lamps can safely remain on 24 hours a day. Turning the lamps off each night will dramatically extend the amount of time required to transport all of the water from the lower bottle to the upper bottle. We recommend turning the lamps off for school vacation periods.
Materials and Preparation
Preparation:

- Assemble three empty 2-bottle systems by connecting a 1-liter bottle and a 2-liter bottle using the special connector. Place each 2-bottle system in a base. Label one base lake materials, one base salt water, and one base blue water.
- Establish locations in the classroom where you can leave the three 2-bottle systems under their lamps. As necessary, set up the extension cords for plugging in the lamps. If necessary, the bottle systems can be moved to a more accessible location when students observe them closely and make drawings, but it's better if students can observe them without the systems being moved.
For the class:
- 3 12oz cups holding 30g of water
- 1 12oz cup holding 30g of a sand-gravel mix
- 1 12oz cup holding 5g of kosher salt
- blue food coloring
- 1 funnel; conical paper cup with 1/2" snipped off the end
For each group:
- 2 mini-lakes (from Investigation 1)
Concept Cartoon

The Evaporation Concept Cartoon is typically used as a formative assessment at the end of this investigation.

1. Ask the question
In the previous science class students may have taken the position that water continued to exist after evaporation, or that it was destroyed by evaporation. Their claims were supported by reasoning but not by evidence. Today they'll continue to investigate the question:
What happened to the water?
Using their mini-lakes and the 2-bottle systems, students will make observations they can use as evidence.
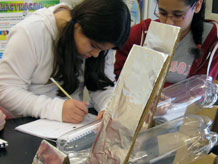
2. Uncover the mini-lakes
Students consider the following:
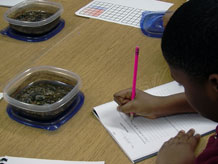
- Look in your Science Notebooks at the weight data you have collected for your mini-lakes. So far, are things changing or staying the same?
- If we remove the cover and leave it off, what do you predict will happen to the mini-lakes during the next week?
- What evidence will you need to collect in order to test your prediction?
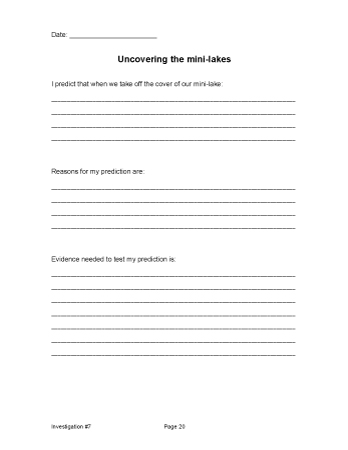
Students record their prediction in their notebooks and explain their reasoning and describe the evidence they'll collect to test their prediction on the [Uncovering the mini-lakes] page in their Science Notebooks.
When they finish, students first weigh the mini-lakes with the covers still on, and record that weight in the data table and on the graph. They then remove the covers. The weight of the covers should still be included each time students weigh the mini-lakes in the future.
Note: Remind students that a prediction is not a guess. They will use their prior experience and knowledge to predict what they think will happen when the cover of the mini-lake is removed.
3. Introduce the 2-bottle systems
Return to the investigation question:
What happened to the water?
Show students one of the 2-bottle systems, without the lamp.
Open and closed systems
The 2-bottle system is a closed system. Elements or components inside the system will remain there, and nothing new will be added to the system. The mini-lakes with the covers off are open systems. The concept of systems will be introduced in Investigation 8.
The class will have three different closed systems to observe. The lower bottle of each system represents a mini-lake or a real lake. It will hold water plus one other material.
The upper bottle in each system represents the air in the room, or the air that makes up Earth's atmosphere. Each upper bottle will start off holding just air.
These simple physical models will help students understand transformations of water at a large real-world scale.
Share with students that evaporation happens slowly when the air above the water is very humid. The lamp will be used to add heat to the 2-bottle system and cause evaporation to happen more quickly, even after the air inside the bottles becomes very humid. Show students a lamp and how it is added to the 2-bottle system.
Remind students that no extra heat was added to the paper towels or the plastic cups (in the previous investigation) while the drops of water were evaporating from them. Water can easily evaporate at cooler temperatures when it is not sealed in a closed system.
Add materials to the 2-bottle systems
Note: When adding materials to the 2-bottle systems and when moving them once they hold the materials, work carefully to keep the materials from splashing around inside the bottles. Drops of sandy, salty, or blue-colored water that are splashed around will leave deposits that may later lead students to conclude that sand, salt, or food coloring has evaporated.
As you work, describe the materials in each of the 2-bottle systems.
- Add the sand-gravel mix to a 1-liter bottle using a paper funnel. Add the 30g of water, close the system, and set it on its stand. These are the same materials used in the mini-lakes.
- Mix 5g of salt with 30g of water, add it to a 1-liter bottle, close the system, and set it on its stand.
- Dissolve 5 drops of blue food coloring in 30g of water and add it to a 1-liter bottle. Close the system and set it on its stand.
Note: Do not add the lamps to the systems until after students have made their initial observations and predictions in Part 4. Evaporation and condensation will start shortly after the lamps have been turned on.
Note: You may choose to add materials to the 2-bottle systems before class. In this case, describe what you put in each one of the lower bottles.
4. Observe and predict
Set up the three systems in a place where 8 students can comfortably observe each. These do not need be the same locations where the lamps are set up.
Assign one third of the class to be responsible for observing and reporting on one system, throughout the investigations. This is their "home" 2-bottle system. Students can also observe the systems for which they are not responsible.
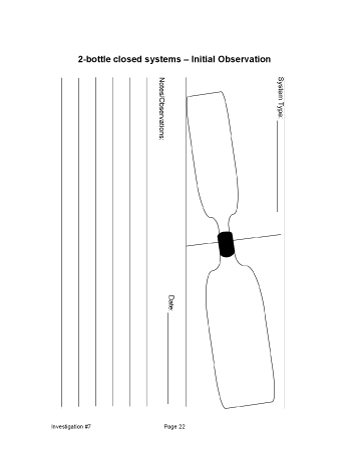
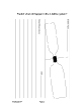
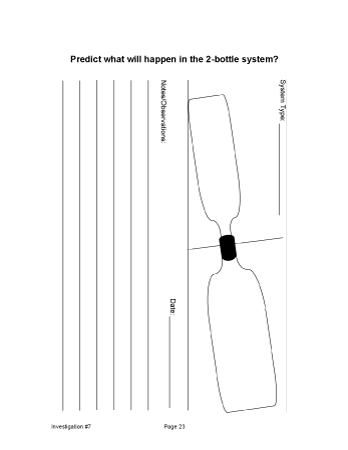
Students annotate the line drawing of their "home" 2-bottle system on the [2-bottle closed systems - Initial Observation] page in their Science Notebooks. Refer students to Annotated Drawings at the back of their Science Notebooks for tips and reminders about making this kind of drawing.
Students use a second line drawing [Predict what will happen in the 2-bottle system?] to predict what their "home" 2-bottle system might look like in one week. The drawing will describe any changes they think might occur and explain the reasoning behind their predictions.
When students finish, put the lamps on the stands, secure them with rubber bands, and turn them on.
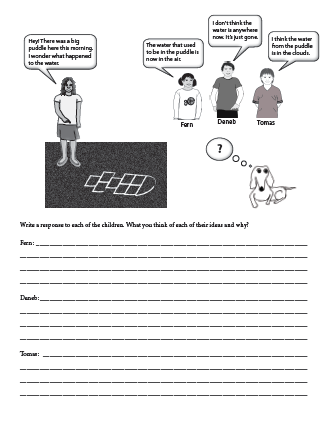
Evaporation Concept Cartoon
Learn about Concept Cartoons in the Concept Cartoons section available from the sidebar.by clicking the Assessment tab at the top of the Grade 5 curriculum Home Page.
This cartoon is designed to probe students' ideas about evaporation. Three cartoon characters argue about an explanation for the disappearance of a puddle of water. Ask students to follow along as you read the cartoon prompts and directions aloud. Remind students to respond to the pros and cons of each idea. Students' responses will give you insight into their understanding of the transformation of water from a liquid to water vapor, a gas. This assessent will help you decide whether the class as a whole or individuals are ready to move on or if they would benefit from a review or additional experience with classroom activities.