How are ice and water the same and different?
Plan Investigation 10
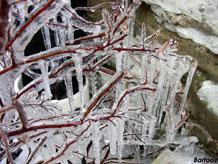
Barfooz, via Wikimedia Commons
The 2-bottle system students just investigated revealed the appearance of water droplets on the inside of the two bottles. Students were challenged to explain the uneven distribution of these droplets. More dramatically, the puddle in the lower bottle slowly disappeared and a new puddle formed in the upper bottle. The movement of water from the lower puddle to the surfaces of both bottles could not be observed and so an explanation of these changes calls for a model. Students began to think of water on two scales: observable solid or liquid water and invisible particles or vapor.
Today students continue to deepen their understanding of transformation of matter. There's no mistaking ice for water, but they are the very same type of matter, only in different states or phases. How can they be the same and yet so different? Even ice takes a variety of forms, such as the frozen surface of a lake, hailstones, icicles, sleet, snow, frost on the window, icebergs, and the common ice cube, to name a few.
This is the first of three sessions in which students investigate and compare ice and water, and learn more about the transformation of water to ice, or ice to water.
Today students compare the properties of ice and water. Next they record the weight and volume of a container of water before it is sent off to the freezer. There is a brief discussion about the condensation that forms on the plastic cups holding ice. Finally, students share their observations about how ice and water are the same and different.
By the end of this session students will start to identify ways in which ice and water are the same and different. This investigation will continue for two more science classes.
Learning Goals
- Understand that liquid water and solid water (ice) have different properties
| Sequence of experiences | ||
|---|---|---|
| 1. Ask the question | All Class | 10 Mins |
| 2. Explore | Pairs | 20 Mins |
| 3. Discuss condensation | All Class | 5 Mins |
| 4. Share observations | All Class | 10 Mins |
Materials and Preparation
For the class:
- Post the investigation question in a place where all students can see it.
- Make a class chart titled, "Comparing Ice and Water"; an example is found in Step 4.
- 2 trays of 1/2-inch mini ice cubes
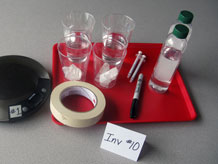
For each group:
- 1 digital scale
- 1 6in strip of masking tape
- 1 fine-tip permanent marker or pen
- 2 12oz clear plastic cups 1/3 full of water
- 2 12oz clear plastic cups each holding 15 ice cubes
- 2 droppers (1cc small syringe)
- 2 8oz plastic capped water bottles, 3/4 filled with room temperature water
1. Ask the question
Review key ideas related to condensation and evaporation that students explored in Investigations 6 - 7. Listen for and highlight the following responses:
- Water isn't destroyed as it evaporates; it moves somewhere else.
- During evaporation, water particles too small to see break away from the surface of a drop or puddle or lake and move into the air, becoming a gas called water vapor.
- The reverse of evaporation also happens: particles of water vapor clump together to form water drops large enough to see. This is called condensation.
- Temperature plays a role in evaporation and condensation. Warmer temperature causes evaporation to happen faster. As water vapor cools, particles clump together to form drops of condensation.
The next set of investigations explores another set of transformations: liquid water into solid water (ice), and solid water to liquid water. Explain that transformations of water (water vapor to liquid water; liquid water to solid water; solid water to liquid water) are called "changes of state" or "phase changes."
Introduce today's investigation question:
How are ice and water the same and different?
Students will continue to discover similarities and differences during the next two investigations.
Note: If you need to review the concept of material properties, here are some examples:
- Glass is transparent, hard, smooth, and brittle.
- Wood is opaque, and will not conduct electricity.
- Oil is sticky and flows slowly (viscous).
Material properties are independent of the size of the sample.
2. Explore
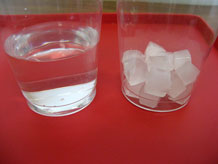
Properties of ice and water
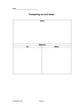
Distribute materials. To address the investigation question, students compare and contrast the properties of ice and water and record their observations on the page [Comparing ice and water] in their Science Notebooks.
Prepare for the next investigation
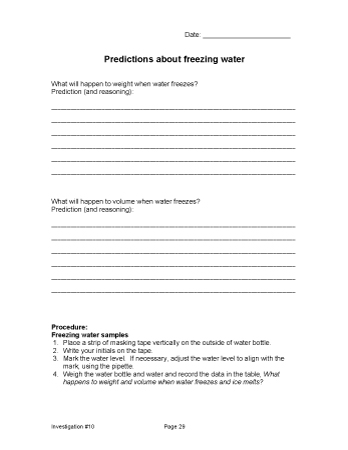
Students collect data in preparation for the next investigation: What happens to the weight and volume of water when it freezes? Show students a plastic bottle 3/4 filled with room temperature water:
- If we keep this water bottle closed, and we don't change it in any way except to freeze it, do you predict its weight will increase, stay the same, or decrease? What makes you think this?
- What do you predict will happen to the volume? What makes you think this?
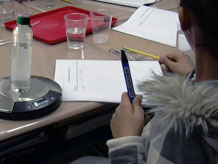
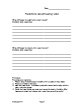
Give students a few minutes to record their predictions and explain their reasoning on the page [Predictions about freezing water] in their Science Notebooks.
Distribute the remaining materials to each group. Each pair of students will prepare their water bottles for freezing, following the procedure described in their Science Notebooks and here:
- Place a strip of masking tape vertically on the outside of 3/4 filled water bottle.
- Mark the water level on the tape. If necessary, adjust the water level to align with the mark, using the pipette.
- Write team members' initials on the tape.
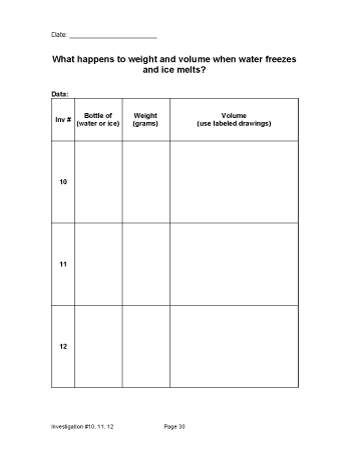
- Weigh the bottle and water and record the data in the table on the page [What happens to weight and volume when water freezes and ice melts?], in their Science Notebooks. For this investigation students will always weigh the water and the water bottle together, so there is no need to determine and subtract tare weight.
3. Discuss condensation
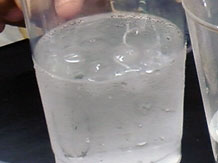
One goal of this brief conversation is for students to pay attention to another instance of condensation. Note that the amount of condensation that forms on the outside of the ice-filled plastic cups will depend on the amount of water vapor in the classroom air.
Do you notice any condensation forming on the outside of your cups holding the ice? Where?
- Next to the ice cubes or ice water, on the coolest parts of the cup just as condensation formed on the coolest surfaces of the 2-bottle system.
- Where are the water droplets coming from? Why do you think they are forming?
- Do you think that water vapor in the air that we can't see and water forming on the outside of the cold cup are the same kind of matter? Explain your reasoning.
Note: A common misconception is that the condensation is water that leaks through the plastic. If someone suggests this, show the class the bottle holding room temperature water and point out that no water is leaking through that plastic.
4. Share observations
Return to the investigation question:
How are ice and water the same and different?
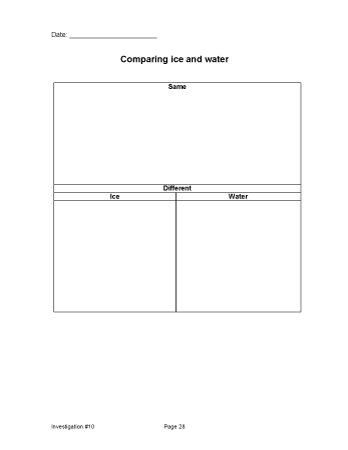
Post a T-chart, or Venn Diagram, "Comparing Ice and Water" with the headings Same and Different. Start by asking students to identify differences between ice and water. As students share the observations they recorded in their Science Notebooks, add them to the class list. Some likely observations are shown below.
Comparing Ice and Water
| Same | |
|---|---|
| have weight take up space are matter feel wet can change temperature |
|
| Different | |
| Ice | Water |
| solid holds a shape hard cold transparent in some parts but not always |
liquid takes the shape of its container soft can be warm or cold transparent |
Save the list of observations. Students will continue to investigate water-ice transformations and will add more observations to the list in Investigation 12.
Recap the investigation
The transformations of water from a liquid to a gas and the reverse are called evaporation and condensation. The transformations of water, from a liquid to a solid and the reverse are freezing and melting.
One question for students to think about, and one they will discuss in a future class, is:
Your bottles of water are going in the freezer. Is water still the same material after it is frozen?