How are materials the same and different?
2. Investigate two cubes
In their first encounter with the cubes, students are given freedom to explore the materials in many different ways. Working in pairs, they closely examine two cubes at a time, both singly and side by side. Because the objects are the same, the investigation offers a controlled comparison of the materials, which focuses attention on their physical characteristics.
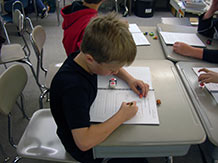
Distribute two cubes to each student. Tell each student that they will become the “expert” on their two cubes. Each group of 4 students should have a full set of 8 cubes. Working in pairs, students will examine four cubes; each student will describe two of these materials in their notebook, using the page titled, “How are materials the same and different?”
Note: In this exercise, students may again confuse object and material. Words that describe a material will include information about such properties as color, texture, odor, and luster. Words that describe the object (in this case the cube) will include information about size, shape, and weight.
Encourage students to “think like scientists,” using their powers of observation and their senses — but not taste –– to help them describe each material. If they need help getting started, prompt them by saying,
- What color is the material? Is it shiny or dull? What else can we learn by using our eyes?
- Is the material rough or smooth, warm or cool? What else can we learn by touching it?
- Can we learn anything with the help of our ears, maybe tapping the material with a fingernail?
- Can we learn something by sniffing the material? By squeezing it?
To help students understand the difference between describing the cube and the material, you can provide this suggestion. When I describe a material, my description will be true even if I cut off a tiny piece of the material, or if I have a huge piece of the material. If the material has a silver color and is hard, and I cut off a piece, the piece will still have a silver color and will still be hard. So that’s an idea you can use to check if you are describing the material or the object.
- Will my description still be true if I have just a tiny piece of the material, or a huge piece of the material?
Encourage students to compare their two materials side by side, and to record the important similarities and differences in their notebooks. Also encourage students to use strong, accurate, and descriptive language. Is the material “smooth” or is it “slippery”?
As you move among the groups, listen for signs that students are beginning to think not only about descriptions (e.g. red, rough, and cold), but about categories of descriptions (e.g. color, texture, and temperature) that will help them compare and contrast the materials.