How do materials help us in our classroom?
Plan Investigating Materials 5
This session provides an opportunity for children to think not just about objects and their materials but about the relationship between materials, their properties, and how those properties support students in their classroom work. This idea that students depend on the properties of materials in their everyday lives is one that they can carry with them long after this class session. Whether it’s bicycles, basketballs, or lunch boxes, students can start to make more sense of the objects in their world as they develop a greater awareness of the materials they count on every day.
This session also introduces students to observational drawing, that is, a drawing used as data. Scientists and engineers use carefully detailed drawings as well as written notes to record their observations or share their ideas with one another. Likewise, students will include drawings as well as text to record their work and their discoveries in their notebooks.
Learning Goals
- to appreciate how the materials in our classroom help us to do our work
- to develop observational drawing skills
| Sequence of experiences | ||
|---|---|---|
| 1. Discuss the challenge | All Class | 15 Mins |
| 2. Draw the pencil | Individual | 15 Mins |
| 3. Collaborate with a partner | Pairs | 10 Mins |
| 4. Consider the results | All Class | 5 Mins |
Materials and Preparation
For the class:- A small bag or other container to hold the mystery object (e.g., a pencil)
- Extra copies of the “Observational Drawing” page from the Science Notebook
- A common object to use for a model drawing (e.g. a lunchbox or shoe)
- A pencil to draw
- A lead pencil, colored pencils, or crayons to draw with
Notebook Pages
1. Discuss the challenge
Note: In this example the mystery object is a pencil, but it could be a felt tip marker or some other simple classroom object made of several materials.
To spark curiosity, introduce a mystery object hidden in a small bag. Explain that the hidden object is made of at least 5 materials, and have children guess what it is. Give clues if you need to:
- It is something you use often.
- It is probably within your reach.
- It would be hard to do your schoolwork without it.
After some guessing, reveal the pencil and describe the challenge. This object is very familiar to you. But imagine there is a third–grade class in a place far away where the students have never seen a pencil. This place is so high–tech, the students do all their schoolwork on computers — reading, writing, arithmetic, drawing — everything! You have a pen pal in that class, and she wants you to describe the pencil you use to write your letters. How are you going to do it?
Let the class brainstorm different ways to convey information about any mystery object. Talk about the advantages and disadvantages of a written description, a photograph, a video, and a drawing. Focus attention on the best way to show the pencil’s materials, and the properties that make those materials useful.
Introduce the term “observational drawing.” Explain that an observational drawing is a very careful drawing that scientists make to record important information so they can remember it and share it with others. Maybe they’ve discovered an unusual plant, or maybe they want to describe what they observed during an experiment — or maybe they want to describe a pencil to a fellow scientist in some faraway place.
Then explain that as they study objects and materials, the students will make both written notes and scientific drawings in their science notebooks — just like scientists and engineers.
- How do you think a scientist would go about making a scientific drawing?
- What would be the first thing to do?
- How can you be sure the drawing will give detailed, accurate information?
When you have consensus that the key to a good drawing is good observation, involve the students in identifying criteria for judging quality work. Write their ideas on the board.
Take a few minutes to model observational drawing for the class. Use a simple everyday object — maybe a lunchbox or a shoe. Speak your observations out loud and explain what you’re trying to do to ensure that your drawing represents the object well. You don’t need to complete the drawing, just illustrate what it means to pay attention to line, shape, and so on. Be sure to remark on parts and materials and to annotate your sketch.
Finally, let students know there is a great question to ask when you they are observing an object or making a scientific drawing of it. That question is “Why?”
- Why does this lunchbox have padded sides?
- Why is the bottom of this shoe kind of sticky?
2. Draw the pencil
Letter from the Engineer
As you work on the drawing of a pencil, you’ll need to think like both a scientist and an engineer. You’ll need to make careful observations about the pencil and record your observations in the drawing. Both scientists and engineers do this. Also, use notes and arrows to explain how the different materials allow a pencil to work well. This is something an engineer would do. For example, why does the pencil have a part that is wood? What problem does the wood solve? What good does it do? How does wood help the pencil to work better? What if a pencil didn’t have a wooden part at all? Is there a different material you could use instead of wood that might work just as well?
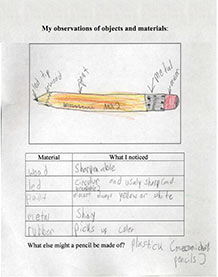
Hand out pencils as needed and have students open their notebooks to the page titled “My Observations of Objects and Materials” Remind them to observe first and then draw carefully.
Ask questions that might help students think about the relationship between the different parts of the pencil, the materials they are made of, and how the pencil works. For example,
- What parts are you drawing?
- Why do you think wood is a good material for the body of the pencil?
- How will your pen pal know what an “eraser” is?
- If we switched the wood and the rubber, would the pencil still work? Why not?
- Why is the pencil painted?
- Why does it say “No. 2”?
Drawing skills will be quite variable. Look for evidence that each student has identified some important parts and materials, that they relate specific properties of the materials with their usefulness, and that they are taking the exercise seriously.
3. Collaborate with a partner
When students have completed their drawing and recording, invite them to exchange drawings with a partner of their choosing. Introduce the word collaboration and explain that it means “working together” and “sharing your best ideas with another person to improve each other’s work.” Explain that scientists frequently collaborate with other scientists to get new ideas and make joint discoveries.
Recall the criteria for successful drawings that you previously listed on the board. Ask the partners to review each other’s work seriously, then to make any changes to their own drawings that would help someone understand the materials a pencil is made of and why. Perhaps say:
Teaching tip: As you circulate among the groups, ask questions and focus the students’ attention on parts, materials, properties, and uses. To anticipate the next unit you might ask, “How much do you think this object weighs?”
- You might be able to help your partner make a more scientific drawing.
- Think about how your partner paid attention to line, shape, and color.
- Will others need more notes to understand the materials the pencil is made of?
When partners are satisfied with their drawings, have them share them with another pair of students. Encourage all students to continue reviewing and revising their work until the time is up.
4. Consider the results
Invite students to take home a blank copy of the notebook page and use it as a scientist and engineer would, recording the details of a backpack, or a toaster, or any object that interests them. Have the students offer some suggestions.
The idea that students depend on the properties of materials in their everyday lives is one that they can carry with them long after this class session. Whether it’s pencils, lunchboxes, bicycles, or bathtubs, students can start to make more sense of the objects in their world as they develop a greater awareness of the materials they count on every day.
Keeping it real: Over the next several months, keep up the conversation about objects, materials, properties, and uses. One way is to display all the children’s scientific drawings in a special area of the classroom. Another is to keep asking the question: How do materials help us in school? As you pull down a window shade, write on an erase board, or play a game of basketball, pause long enough to ask: “What is this shade, board, or basketball made of? How does the material help make it work?”